Jekyll+Netlify搭建静态网站
参考链接:怎么在 GitHub 上用 jekyll 搭建自己的博客
1 引言
本文简要说明如何借助jekyll使用GitHub Pages托管个人网站。通过快捷方式,用户可以在Windows端一键打开VSCode,编写、预览markdown文章并上传至GitHub,借助GitHub Pages托管至<用户名>.github.io(或托管至Netlify)。本地网站仓库在WSL中。
2 基本方法
2.1 创建仓库
首先在jekyll主题官网(jekyllthemes.org)找一个喜欢的主题,在GitHub找到其模板仓库,使用模板创建新仓库,以用户名.github.io命名(以主题chirpy-starter - Github为例): 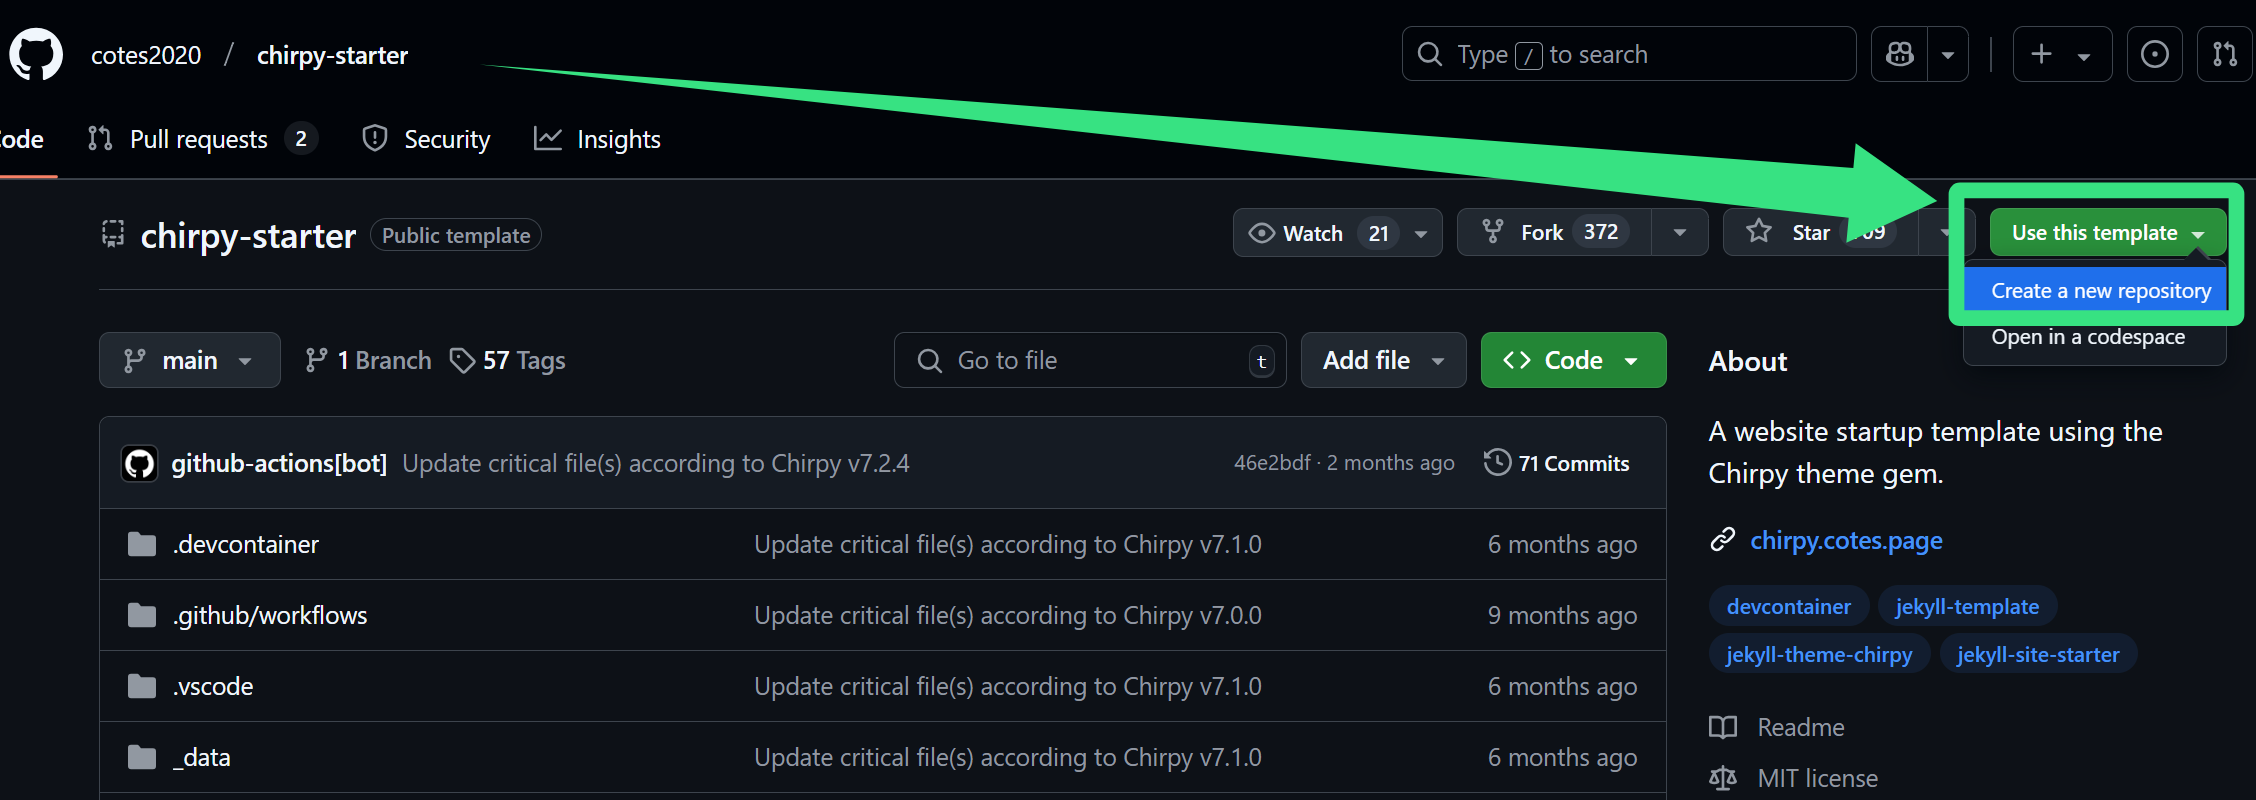 本地
本地git clone该仓库。为了方便,在Windows桌面创建快捷方式:
1
wsl.exe code ~/用户名.github.io
2.2 配置插件
略
2.3 发表文章
在_posts目录中创建并撰写.md文档。文件名必须为YYYY-mm-dd-标题.md,以如下格式开头:
1
2
3
4
5
6
---
layout: post
title: <标题>
tags: <标签>
categories: <分类>
---
写好之后执行下述命令(三选一),即可本地预览:
1
2
3
4
5
6
# 默认4000端口
bundle exec jekyll s
# 提高构建检查等级(推荐)
bundle exec jekyll serve --safe
# 自定义端口5555
bundle exec jekyll serve -P 5555 --watch
确定无误后git commmit, git push到仓库即可。
3 扩展内容
3.1 开启评论
- 在GitHub应用中安装giscus插件。
- 在仓库
Setting-General-Features中选中Discussions,开启GitHub Discussions功能。 - 打开giscus配置页面,配置下列内容:
- 仓库:
用户名/用户名.github.io; - Discussion 分类:General
- 仓库:
- 在”启用 giscus”一栏会有生成的script。关注其中下面4行:
1
2
3
4
5
6
7
<script src="https://giscus.app/client.js">
     data-repo="digitzh/digitzh.github.io"
     data-repo-id="xxx"
     data-category="General"
     data-category-id="yyy"
...
</script>
打开
仓库名.github.io/_config.yml文件,找到comments:部分,配置下列项:1 2 3 4 5 6 7 8
comments: provider: giscus # [disqus | utterances | giscus] ... giscus: repo: digitzh/digitzh.github.io # <gh-username>/<repo> repo_id: xxx category: General category_id: yyy
3.2 统计浏览量
使用GoatCounter
参考链接:获取 GoatCounter 页面浏览量 (jekyll-theme-chirpy) |Ju-ing 的博客 为了原生的体验,本站使用goatcounter计数,只需在config.yml中配置即可,见参考链接。
使用不蒜子
Jekyll 3.2之后的版本是基于Gem主题的(文档),隐藏了_includes、_layouts等文件夹。若要使用不蒜子等统计方式,需修改页面html。需要从gem目录拷贝文件到仓库目录下。定制性更高。
4 使用Netlify托管
上面介绍了使用GitHub Pages托管网页。也可以使用Netlify托管,提升国内访问速度,同时方便博客asset管理。
4.1 构建网页
需要配置(参考链接): Build command: jekyll build Publish directory: _site
之后构建即可。
可能会遇到如下问题:
1
2
3
4
5
6
7
10:43:51 AM: Bundler found conflicting requirements for the Ruby version:
10:43:51 AM:   In Gemfile:
10:43:51 AM:     Ruby
10:43:51 AM:     html-proofer (~> 5.0) was resolved to 5.0.10, which depends on
10:43:51 AM:       Ruby (< 4.0, >= 3.1)
10:43:51 AM: Error during gem install
10:43:51 AM: Failing build: Failed to install dependencies
尝试按照Netlify的AI解决方案,在Gemfile中添加:
1
ruby '>= 3.1', '< 4.0'
之后报如下错误:
1
2
3
11:15:31 AM: Your Ruby version is 2.7.2, but your Gemfile specified >= 3.1, < 4.0
11:15:31 AM: Error during gem install
11:15:31 AM: Failing build: Failed to install dependencies
显然,原因是Netlify的Ruby版本为2.7.2。原因未知。
总结:设置Ruby版本为3.3.5即可解决。(参考链接)
4.2 安装jekyll-postfiles插件
jekyll-postfiles目前不支持GitHub Pages,支持Netlify。此插件可以使你将博文与相关图片、附件放在_posts下的同一文件夹中,避免图片与博文分开存放导致的引用繁琐、重命名/路径更改图片需要修改引用等。